Using the Document Library
The document library is a place where you can collect and manage documents for use on web pages, events, and news. To access the document library, click 'Content > Library' in the top administration menu and you will be taken to a page that lists the documents currently in your library:
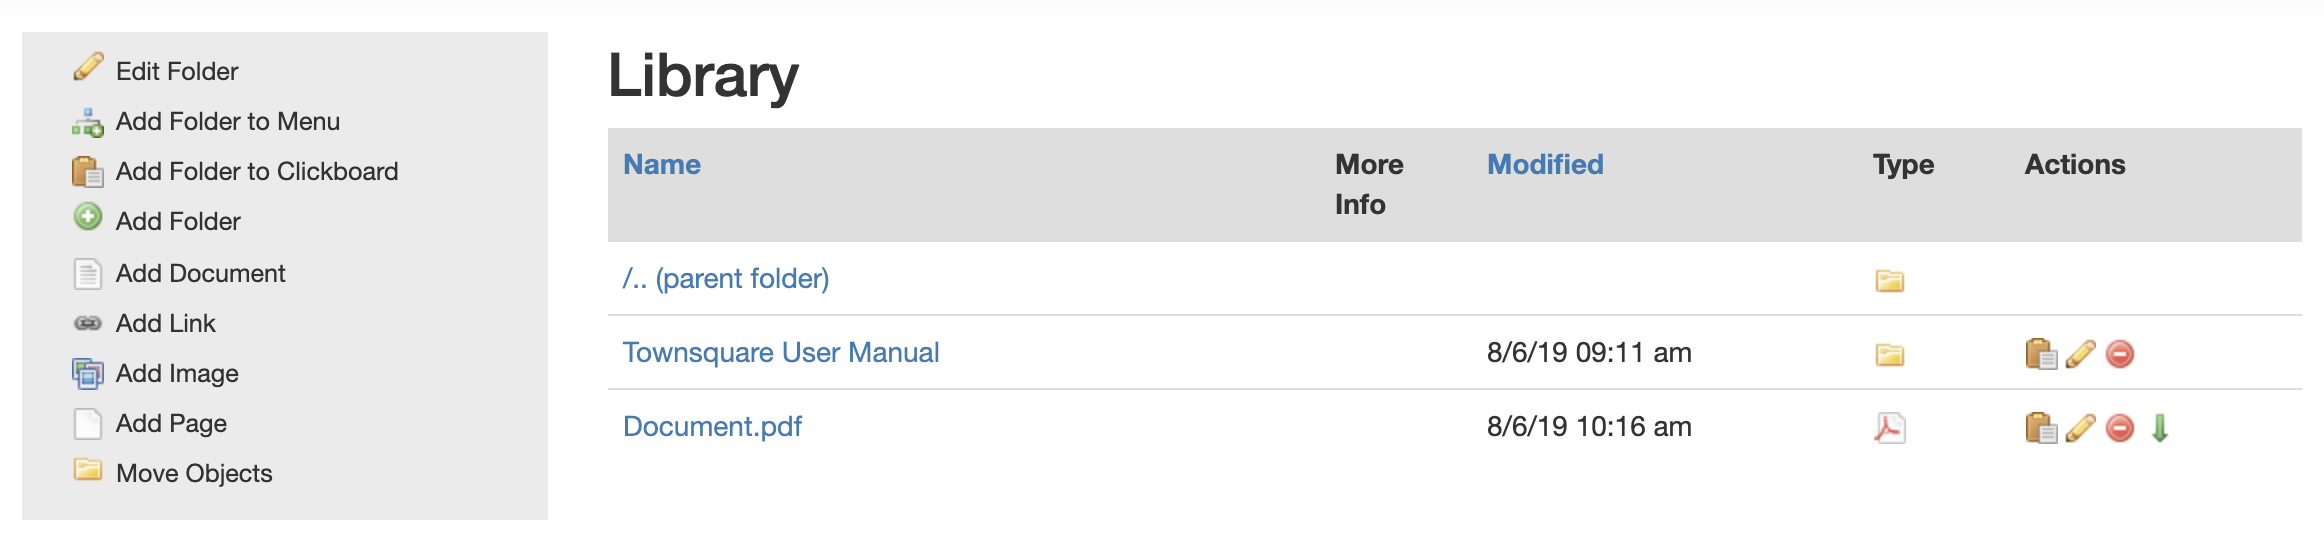
On this page you can accomplish the following tasks:
From Menu
- Edit Folders (change permissions)
- Add folders to menu/clickboard
- Add Folder
- Add Document
- Add Link
- Add image
- Add Page
- Move Objects
From Actions Column
Edit Folder
When the 'Edit Folder' link is clicked you will be taken the the following screen:
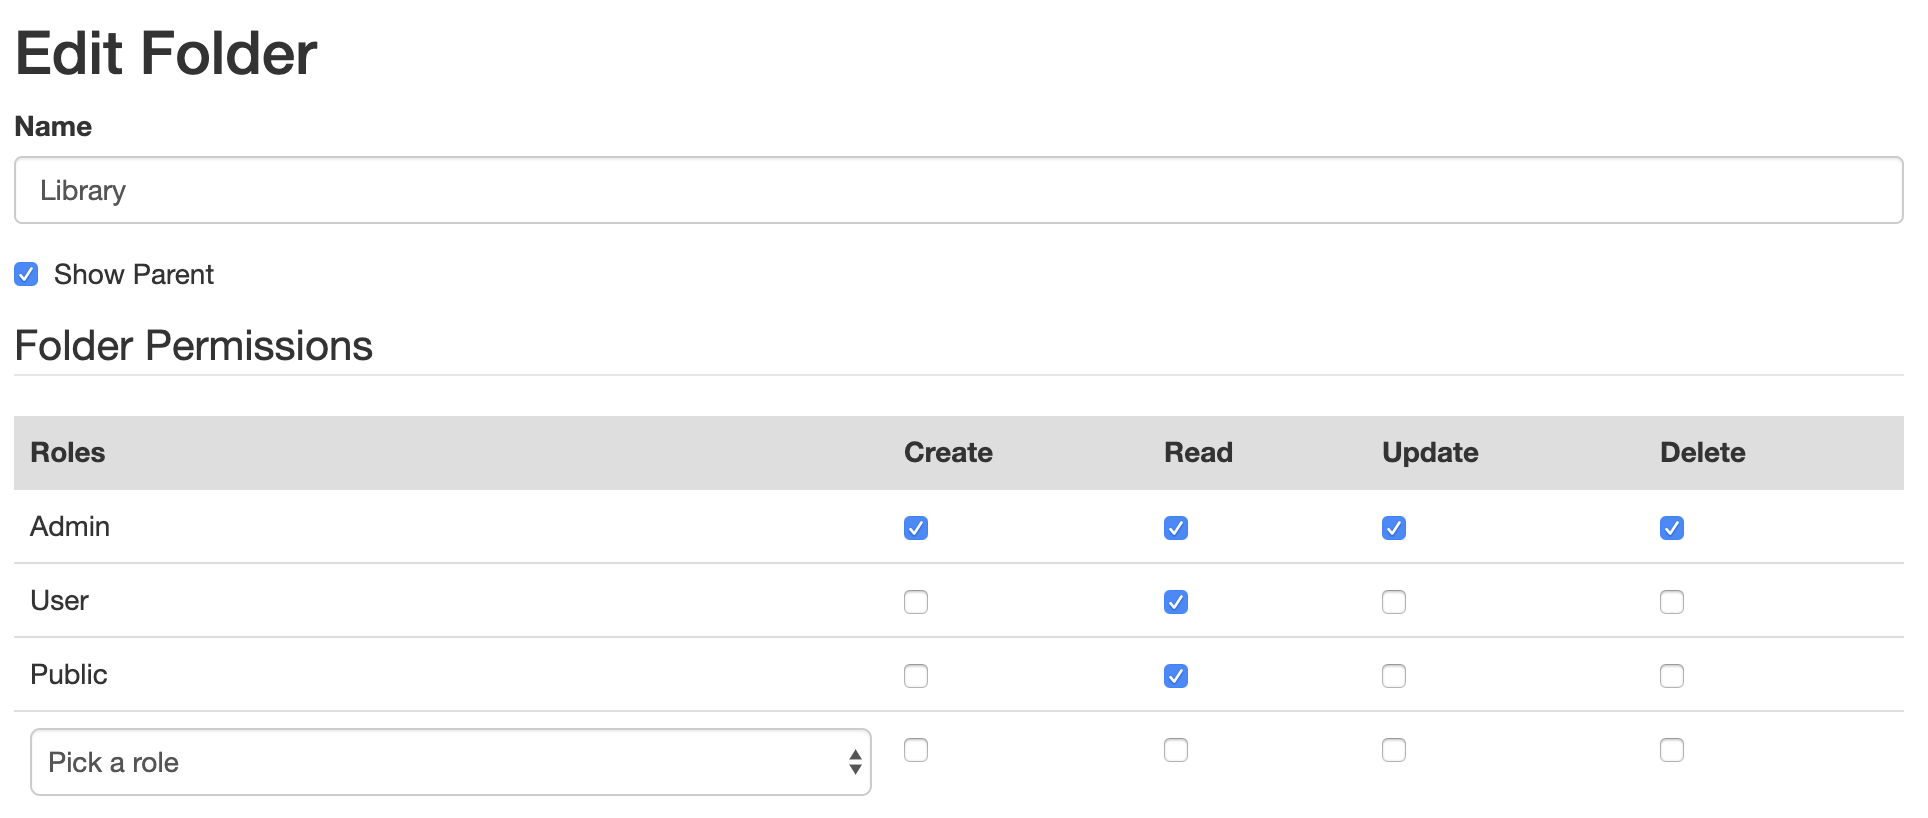
On this page you can accomplish the following:
Edit folder name: If you change the text in thie 'Name' field this will change the name of the folder.
Show Parent: If this box is checked it will show the parent of this folder. If you uncheck this box, this text will not display on the top line of the folder list: /.. (parent folder)
Folder Permissions (Advanced): Folder permissions control who can view specific content within folders on the website. The typical structure for viewing content is listed above, with the Admin role having rights to create, read, update and delete content, with users and public roles having only permissions to read website content. Should you need to remove content from searches to make it only viewable by admin, uncheck the read permissions for the uesr and public roles, and the content within the folder will not display in searches.
Add Folder to Menu/Clickboard
Should you wish to add a folder created in the document library to a menu, this link will add the folder location to a menu. To learn more about menus, view the Editing Menus page for more information.
The Clickboard is a place where you can store documents, images, events, news (essentially any object) for use later on another object. In practice, if you click the add folder to clickboard button the folder will be saved and stored for use later use if you'd like to associate it with a page, event, news item on the website. Once this button is click and you edit another piece of content, you will see the folder in the related items section of that content. To learn more about the clickboard, please visit the Clickboard information page.
Add Folder
This link will allow site administrators to create folders within the document library. The only option on the screen is to add the label for the folder to be created.
Add Document
This link allows site admniistrators to upload documents to the document library. Various document types are supported, including PDF, Word Documents, Excel Documents, Power Point presentations and more. Please note that there is a 100mb file size limit on documents, and for good reason. When large files are added to a website, they take a long time to upload and download, which increases the not only the length of time to view a file, but also increases the amount of bandwidth your site uses, which can increase your monthly fee. Thus, please optimize website files as much as possible for easy website use.
When you click the add document link you will be taken to the add documents page, where you can do the following:
- Add File
- Add Name
- URL slug
- Description
- Link to related items
- Tag this Document
- Send Updates to Subscribers
Add File: Choose a location from your computer that contains the file you would like to upload to the document library
Add Name: Add name for file, which is used as a label for Clickboard items
URL slug: Add custom URL for document. In this field you only add the custom URL, separated by hyphens. For example, for an agenda item the title may be 'meeting-egenda-october-2019'. To access the file, users would type 'https://www.website-title.com/meeting-agenda-october-2019'.
Add Link
Adding links to your document library allows site administrators to create links to external websites for reference. On the add link page you will be asked for the following information:
- Name
- URL slug
- URL ((start with http://, ftp://, etc...)
- Description (optional)
- Link to related items (optional)
- Tag this link (optional)
- Send updates to subscribers (optional)
- Geocode this link (optional)
Add Image
Images can be added to the document library as needed. Possible extension types that can be uploaded are JPG, PNG, TIF, and more. You will be asked for the following informatoin:
- Name
- URL slug
- File
- Description (optional)
- Link to related items (optional)
- Tag this link (optional)
- Send updates to subscribers (optional)
- Geocode this link (optional)
The two important pieces of information to add when uploading images is the name and file fields.
Add Page
Adding website pages starts with clicking the add page link. On the add page screen you will be asked for the following information:
- Name
- Which Template?
- URL slug
- Summary (optional)
- Content
- Zone 1/2 (not all templates)
- Add Page Images (optional)
- Link to Related Items
- Search settings (optional)
- Send updates to subscribers (optional)
- Geocode this link (optional)
Name: Title of the page is entered in this field.
Which template?: Depending on your website, you may have multiple template options. You may have a Content page - full width template, you may have a template that has sidebar images, or another custom template. The default setting here would be to use the content page with sidebar images.
URL slug: Adds custom URL for the page. In this field you only add the custom URL text, separated by hyphens. For example, for an 'About Us' page, you would add about-us.
Summary: This is the text that will display when you send out an email notification to subscribers. Visit the email notifications page to learn more about email functionality. If no text is added here to this field, the email will display the title of the page twice.
Content: The field will allow users to add text, images, tables and links to a webpage. Visit the Adding Content page to learn more about how to add content and best practices.
Zone 1 / Zone 2: Depending on what template you're using you may have the option to add an extra zone or two at the middle or bottom of your page. These zones can be customized so the background color is a different color and is the full width of screen. This is good for highlighting content at the center or end of your page.
Add page images: Page images are displayed on the right side of the layout and captions can be added to the images. These images help convey the idea of the page, but are optional.
LInk to related items: This is the Clickboard functionality within Townsquare.To learn more about the clickboard, please visit the Clickboard information page.
Move Objects
If you would like to move documents, pages, or links from one folder to another you will use the move objects link. Once this link is clicked a popup will display that will show two columns:
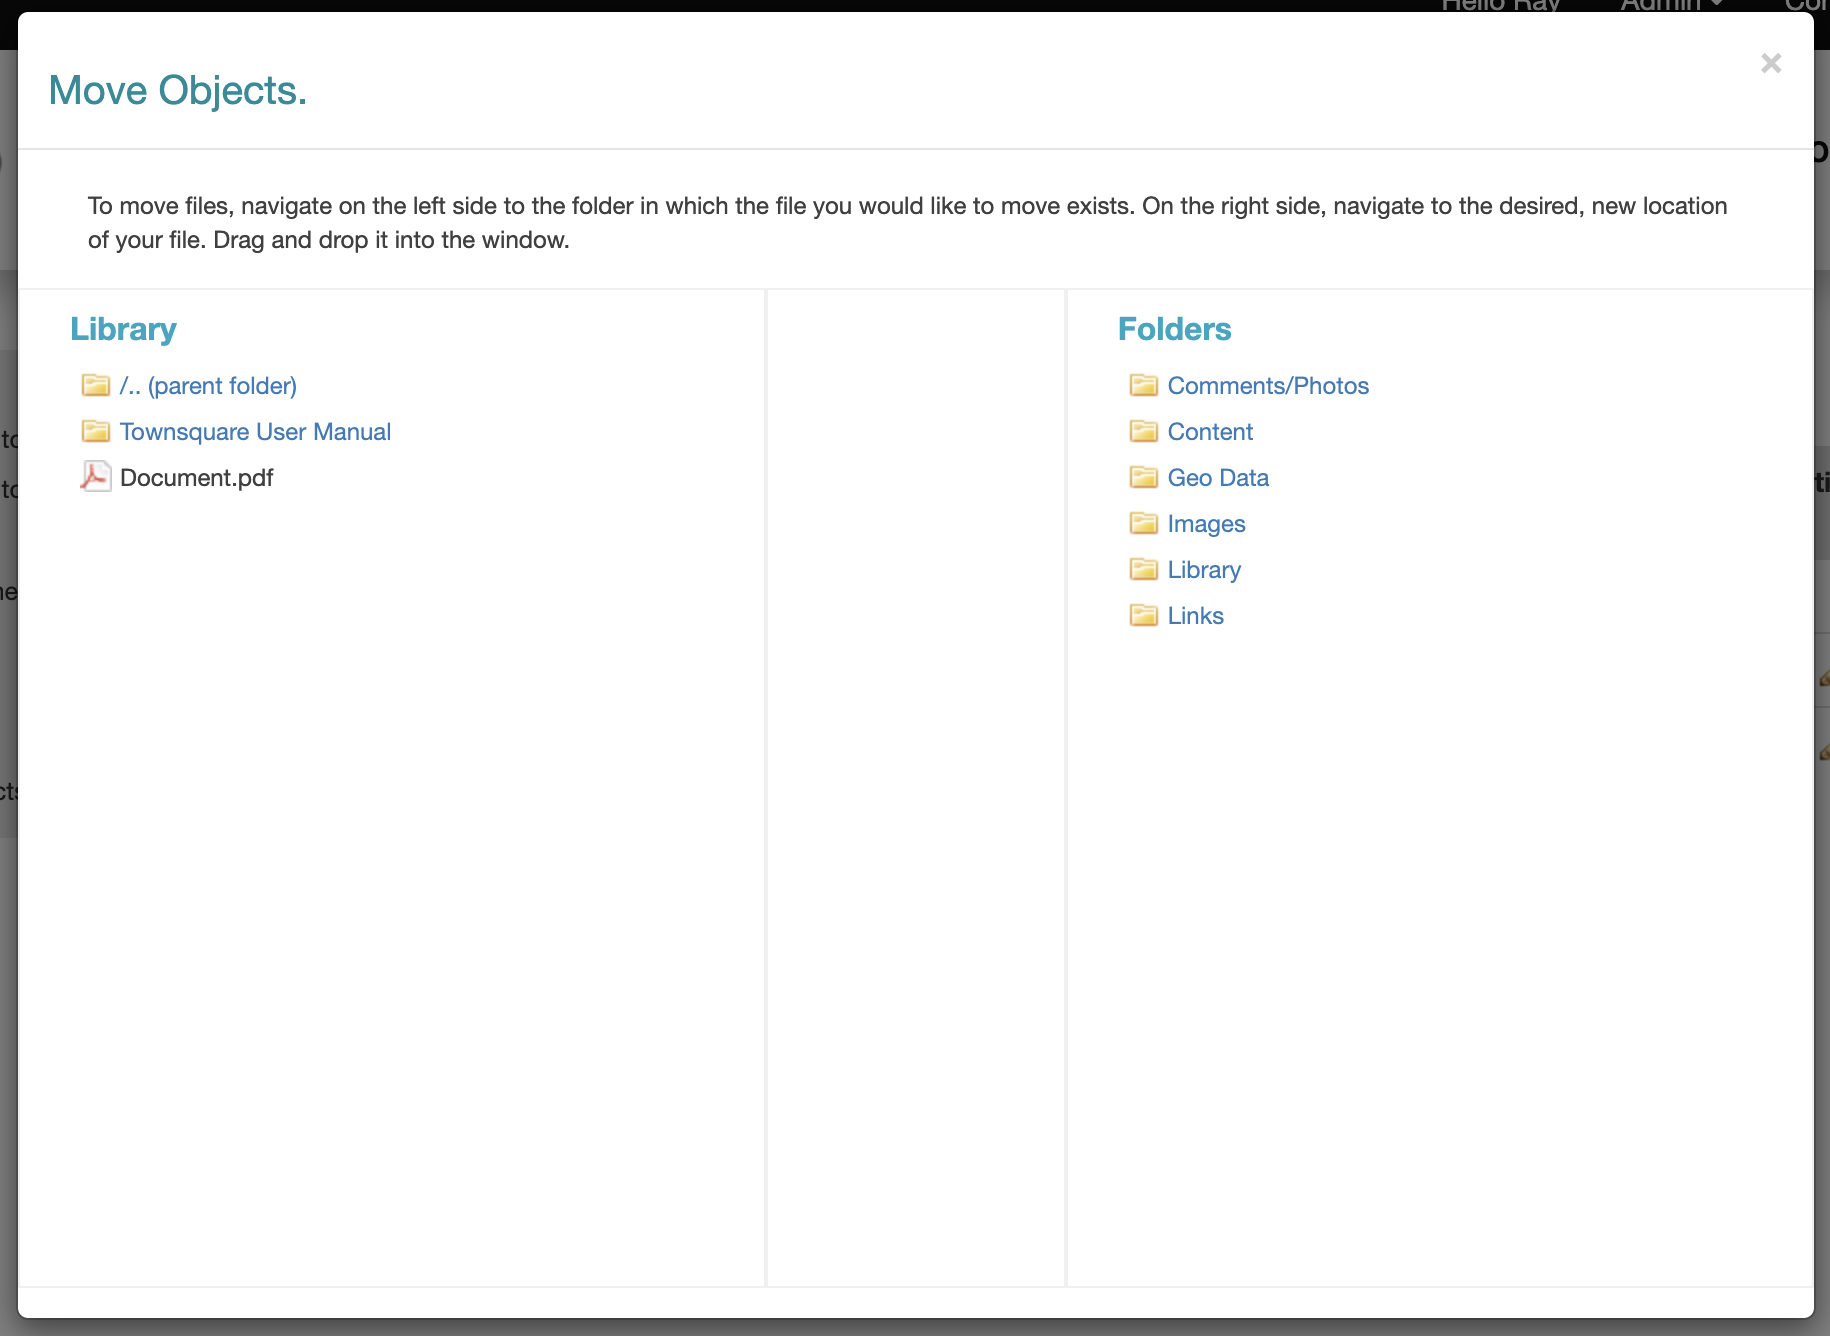
The left column is displaying the contents of the library. The right column is displaying all the folders on the site. To move objects from your library to another folder in the library, in the left column, navigate to the folder that contains the files you'd like to move. Then on the right column click to the folder where you'd like to move those items. Once you have your origin and desitnation folders ready, click on the file in the left column and drag it over to the column on the right. You should see a visual confirmation that the file has moved. You can move files and folders in this way, and note that moving files and folders will not affect any links you have set up in pages, so feel free to organize your library as needed.
Add documents to clickboard
This option from the actions column will allow you to add the document or folder to your Clickboard so you store for later use on pages, events, or news. To learn more about the clickboard, please visit the Clickboard information page.
Edit documents
This option from the actions column (clicking the pencil icon), will allow you to edit the details of a document, such as the title, the description or the document itself.
Delete documents
Clicking the delete icon (![]() ), will delete the document from the library.
), will delete the document from the library.
Download documents
This option from the actions column (clicking the download icon), will download the document from the library.